
Your roster belongs to the course, so every assessment in the course uses the same student list. Add students before you schedule an administration.
Important: Use the email address each student will actually use. Students reach their assessment through that email, and if they create a LASSO account it must use the same address.
Open the roster
On Courses, click MANAGE STUDENTS on your course’s row. (From an assessment’s administration page, you can also click MANAGE STUDENTS under Assessment Roster.)
Upload a roster (recommended for more than a few students)
- Click DOWNLOAD ROSTER TEMPLATE. A CSV file downloads.
- Open it in Excel, Google Sheets or another spreadsheet program. Enter one student per row: first name, middle name (optional), last name, email, and any optional fields.
- Save it, keeping the .csv format.
- Click Add Course Roster and choose your file.
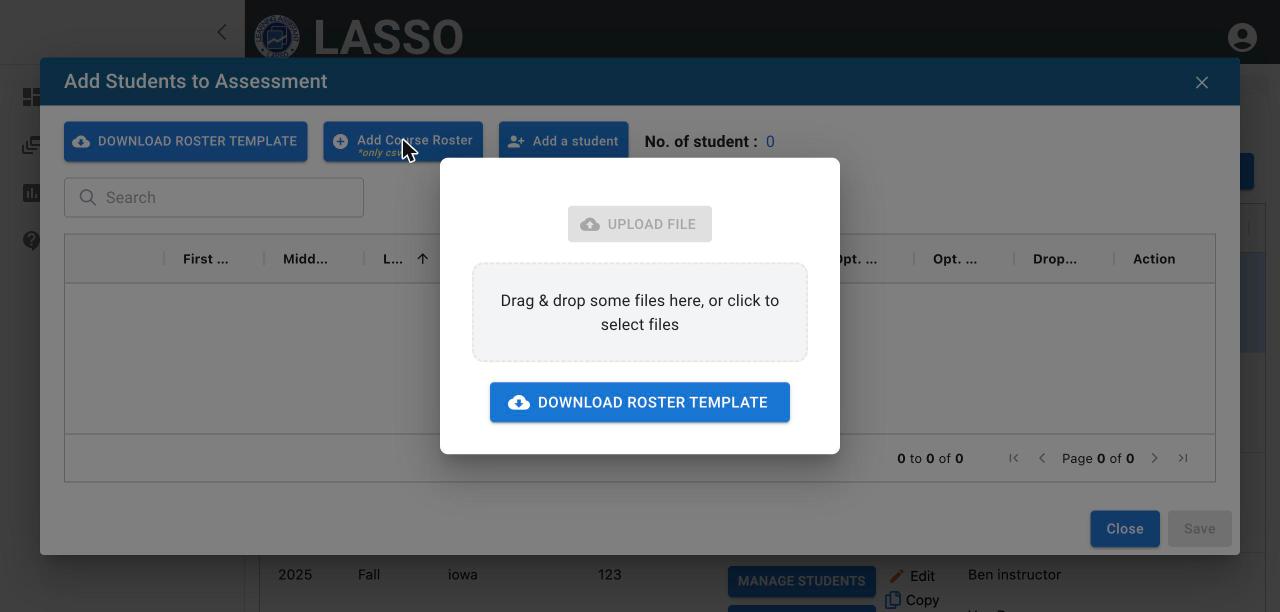
Tip: If the upload reports Invalid Emails for addresses that look correct, add those students one at a time with Add a student and let us know at contact@lassoeducation.org.
Add one student
- Click Add a student.
- Enter First Name, Last Name and Email. Middle Name and Opt. Fields are optional.
- Click Add, then OK on Student(s) added!
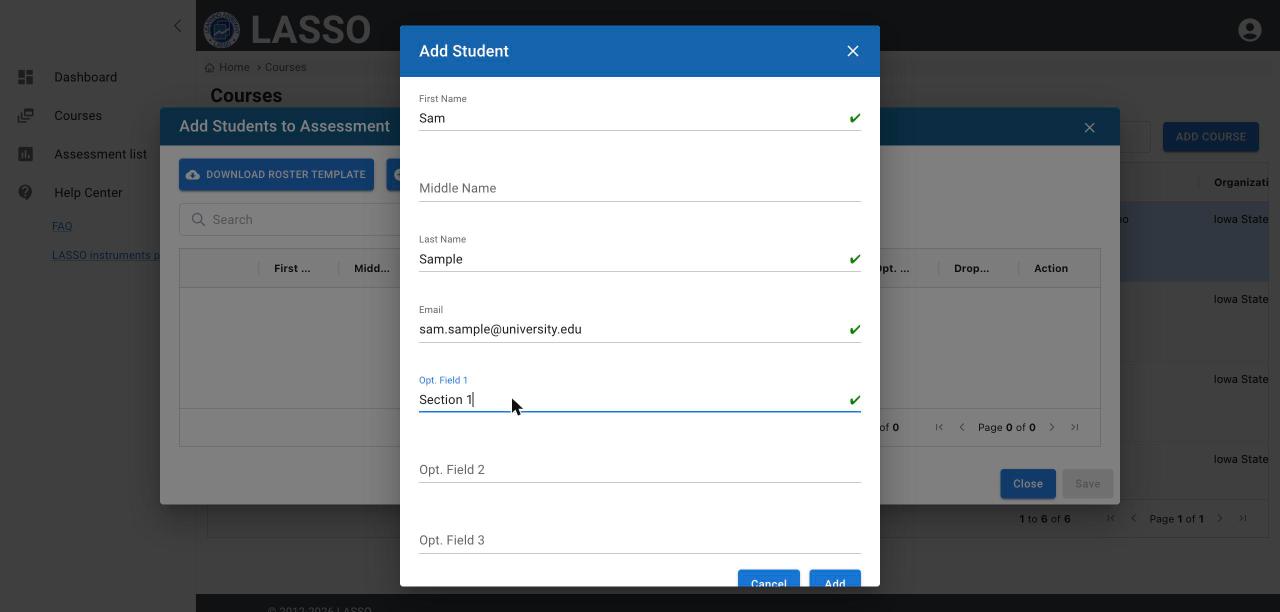
Tip: If Add stays grey after you type the email, click another field.
Optional fields
Opt. Field 1 to Opt. Field 3 are for anything that helps you manage your course, such as a student ID or section number. They appear as columns in your roster.
Keep the roster up to date
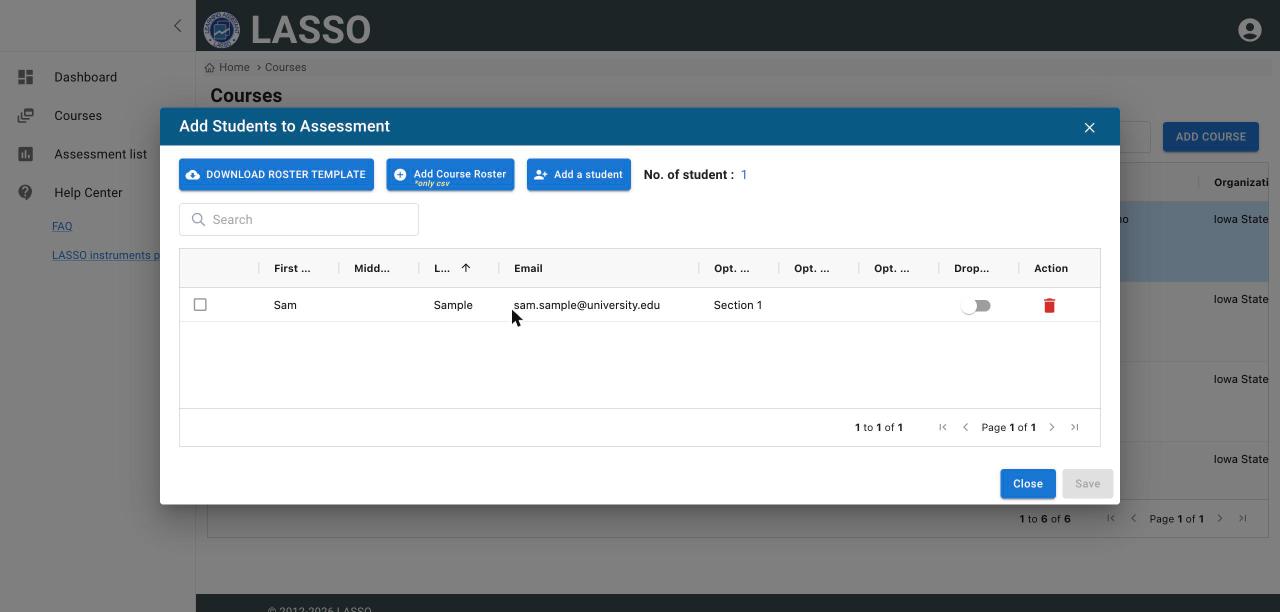
- Dropped: turn on the switch for students who drop. Their records stay, and reports can include or leave them out.
- Delete: click the red trash icon to remove a student added by mistake.
- Delete several: check the boxes next to students, then click Batch Delete student.
- Search finds a student by name or email. No. of student shows the total.
Click Close when you are done.
Next: Schedule an administration
All instructor guides | Help Center home
Verified on LASSO version 10.1.2, October 2026. Questions? Email contact@lassoeducation.org.